Friday, June 26, 2015

Teach Students to Create Mood in Writing


Humorous, mysterious, eerie, happy, gloomy. whimsical, the list goes on! Creating mood when writing is what gives a piece of writing life! Often students struggle with this literary element unless they are directly taught how to create mood. So...how is that done? The ideas below give you a place to start. If you have other ways you teach mood, be sure to add them in the comments section!

Mood: The feeling you have when listening to or reading a story


1. Discuss words that describe a mood for a story, chapter or written piece. Make the list on the board. Ask students to choose one word and give a few sentences orally that could be used to support that word. ie. mysterious "He was confused. That hallway wasn't there only a minute ago. What's going on here?"

2. Read a short selection from one of the Edgar Allen Poems or stories. If you want spooky, you can't do better than Poe! Choose selections from other stories your students may have read in class, or on their own. Decide the mood. Discuss that mood will most likely change throughout a story. Another great book is "The Best Christmas Pagent Ever". The first paragraph is terrific!

3. Write different types of mood on slips of paper, fold and put in a hat. Ask students to pull our a slip of paper and write a paragraph that would show that mood. Exchange with a partner and ask them to read the selection, then guess what mood is being conveyed.

4. Show pictures from the Internet. Ask students to write one word to describe how they feel about that picture. List the words on the board and discuss.

How about some great videos about teaching Mood (and tone)

This short video is an illustration of pictures and words that describe the tone. It would be great to use in an opening lesson.


If you need some good pictures to use with your lesson, check out the sites below:

This is a terrific Pinterest page with loads of great writing pictures...great for mood!
Writing Picture Prompts
This site has a PowerPoint of 50 great pictures:
50 Picture PowerPoint

If you need a great resource to test and evaluate your students' writing, check out the resources below by clicking on the cover.


Monday, June 22, 2015

Teach Your Students How to Use Magic in Writing!


If you have any reluctant writers (of course you do!! LOL), you already know that to get them to write ANYTHING, they must be totally engaged in the topic. What kid isn't enthralled with magic? The Harry Potter books prove that!

Get the discussion started by grabbing their attention with a great hook! For example, the video below shows one spell after another from Harry Potter. You only need to show a few to get the discussion started. How did magic make the Harry Potter books interesting? How do you think J.K. Rowling decided on the magic to be used? Did she follow any rules? Make a list of other books that use magic. How are they alike? Different?


Discuss with students that authors do follow certain rules to make sure the magic seems real. It's called suspended disbelief. The reader is willing to "believe" what they read because it makes sense.  To make that magic seem real, students should think about the rules below:

1. There must be rules for the magic! As the writer constructs the story, certain magical laws need to be put into place. For example, wands are used to do magic, magic carpets fly, a magic ring makes the one who wears it invisable.  These laws are as dependable as gravity, and can not be changed on the writer's whim.  That means before the story is started, the writer should plan out the magic. Who can do it, how is it done?

2. Magic has to have limits. If a magic word can solve all problems the minute it is said, where's the story in that? Magic may need certain tools to be carried out, like a magic lamp, or certain knowledge might be needed. It may take a special person (thinking fairy godmother here) or maybe it can only be used under certain conditions. These decisions should be made before the story is begun.

3. Be inventive. If the magic is the same, old same old, it's not as interesting as a fresh take on something. For example, maybe the car is magic, or a pencil.

4. The magic has to be important to the story. If it's not important to the story, why is it there? Students need to find a way to use the magic in the plot of the story. Students should ask themselves, "If there was no magic, would the story still work?" if so, then the magic isn't really needed in the story at all.

5. Use lots of descriptive words to describe what the magic looks like, feels like, or even how it smells! That's the way to pull the reader deeper into the story.

6. While magic is important in the story, it shouldn't be more important than the characters. Their story should shine through with the support of magic.

7. Make the magic unpredictable. What are the costs, problems, affects of using the magic. What happens when the magic doesn't work, or works in an unpredictable way?

8. Have fun with it! Writing a magical story should be exciting and fun. A student's mind should be pondering the next chapter or scene before going to sleep at night, on his way to school, or even during math class. Yes, it's true, that far away look in your students' eyes during fractions might just be the plot of the next best seller. Enjoy!!

These ideas were adapted from: http://www.writing-world.com/sf/martin.shtml

Evaluating Write to match Common Core standards can be a bit tricky! Make it easy with these resources: 


Sunday, June 21, 2015

The Importance of Setting in Writing


If ever there was a time to learn about describing words, it's when writing the setting of a story! It's been said many times that the setting of a story is actually another character in the story. Nothing could be more true! Think about actors of a science fiction movie acting in front of a green screen. This is a scene without a setting! It doesn't come alive until that setting is added in! The setting is the skeleton writers use to build and develop the characters and the story.

So...how can we, as teachers, help our young writers learn how to write a good setting? Below are a few practice exercises that have worked well for me. Many of the exercises below can be added to the writing notebook. That makes them available should students want to expand on them later. 

1. Show students a picture of a setting. You can use picture books, magazines or pictures you find on the Internet. How does the picture make them feel? List adjectives that dscribe that feeling when looking at the picture. Why does it make them feel that way? Ask students to brainstorm a sentence or two about the setting that could start the story.  Finally, ask students to write a paragraph describing the setting and give a hint about how it may impact the story later on. i.e. "The forest sparkled in the sun that drifted to the ground through the trees. It seemed friendly, even a welcoming place as it stretched it's arms out to meet Sarah. Little did she know what was hidden behind that welcome." 

2. Ask students to visualize their favorite place. Ask them to not only see it, but listen to sounds. What do they smell? What can they touch? Next ask students to write down what they visualized. Finally, ask students to use that setting to write the first paragraph of a story, and how a fictional character might fit into that setting. Remind them that the opening of any story needs to hook the reader and make them want to read more!

3. Give students a setting, (the hospital, the side of a mountain, deep inside a cave etc.) and ask them to use it to write one or two of the first paragraphs of a story using this setting. Allow students who want to share, to do so. I never force students to read this type of writing. Some students take time to overcome shyness. Forcing them to read stunts what they will write. Doing this type of writing at least once a week or so will become something your students look forward to, and can be the spark they need to create a great story. Another idea to use with a setting, ask students to get with a partner and write a description of the setting using what they see, hear, smell and touch. 

4. Choose a favorite fairy tale. How would it be different if it happened in a different time, or a different place? What types of things would change? Would the three pigs build different kinds of houses if they lived in the desert? What would change if Snow White was the president of the United States? Choose one fairy tale to brainstorm ideas with the class, write the ideas on the board, and the first couple of sentences the group generates. Next have students choose their own fairy tale and change the setting. Write at least one or two paragraphs to start the story.   

5. Use improv! Choose one story, movie, or fairy tale and have a group of four or five students come to the front of the class. Give them two or three changes in settings to act out in a minutes or two. It's not only fun, it really makes kids think! It is a great way to see how setting can change everything!

6.  Use a favorite movie to get them thinking.  Put students into groups of two or three.  Give them two minutes to brainstorm favorite movies.  Give them one more minute to choose just one.  Then ask students to change the setting of the movie.  List ways it would change the movie.  Then share each group's work with the class. 


Do you need writing worksheets that address the Common Core in third and fourth grade?  Check out the resources below by clicking on the picture.


Monday, June 15, 2015

What to Do When Cooperative Grops go BAD!


The first time I put students in groups I thought I'd lose my mind. It was chaos! What was I thinking?  There is nothing that can ruin your day (as well as that of the students') faster than cooperative groups that devolve into chaos.  But cooperative groups are great for learning...right??? I wasn't so sure,  but over time, I knew I had to read the research. That made me realize that  if I wanted my students to really think deeper, gain communication skills, and really (and I mean REALLY) learn the content, then I had to learn how it was done! 

Why does working in groups work so well for students? I think it's because we are tapping into a basic part of our human evolution. We are social creatures that work together to solve problems. I don't think that caveman thought he could bring down a mammoth by himself! If our students are deprived of the time they need to work with each other, behavior management gets harder and kids are less happy. In my own classroom, I discovered that after group work, students were ready to work alone, and even that distracting classroom chatterbox was quieter. The trick to tapping into this powerful tool is preparation. Below is the procedure I used that was very successful. I ended up doing group work in some form many times a day. Sometimes it was just to choose a partner and read or discuss something for a few minutes, sometimes it was to do experiements, sometimes to brainstorm. Does it work? All I can say is everytime I was observed by the principal she would remark on how well the kids got into groups, and stayed on task. They did, and more importantly, they learned lots!

1. Gather students and discuss the rules for group work. My main rule for getting into groups is: If you do not have a partner and someone asks to be your partner, that is a huge complement. It is rude and cruel to say no. If someone asks to be your partner and you already have one, tell them you will be their partner next time....and mean it. Students have to understand that being rejected hurts. Learning how to work with everyone is a life skill that begins right here. Then practice. I have students practice choosing a partner two or three times, and responding politely and kindly to each other. We keep practicing until they get it right. I always start with selecting one partner. Self-choosing larger groups would work the same, but starting with a partner is enough to begin with. Each time we go into groups throughout the year, we go over this rule again. Often I tell students they must choose a partner that they have never had before, or have not often worked with. This gets them out of always pairing with their best buddy. I do put students into groups myself when I have a particular purpose for doing so, but I prefer to give kids some choice in the matter. It has been my experience that it works better that way. If I have two kids who should NEVER work together, I talk with them privately and tell them they can spend all the time together at recess that they want, but in groups I want them to branch out and experience other people. Actually what I want to say is "You guys drive me to an early grave when you work together, knock it off!"  But I don't. 


2. Have a procedure in place once partners are chosen. Decide ahead of time where you want students to go. Should they choose a spot on the floor, pull two chairs togeher, push desks together? Vary where students work, as variety spices things up a bit. It's amazing how just changing where groups go puts a smile on their face. I don't understand it, but it does. Write this on the board. Then write other directions students should follow. Be specific about the job to be done and the product (if any) that will be made. If students are getting together just to read, you may write on the board where they will go, what is to be read, go over listening skills for the child listening, and at what point readers switch. Students have to know for sure what they are to do in the group, without that, the group goes to "chaos" in a flash. The LAST thing you want to happen is for kids to get into their group and ask, "What do we do?" and get the answer, "I don't know!"  

3. Before releasing students, go over the behavior you expect to see. All students must participate and all opinions must be heard without making fun of anyone. This is absolute. If I see someone abusing the group rules they must sit out and not participate. I usually have to do this a time or two at the beginning of each year. Once kids know I mean business, they do whatever they can to stay in the group. Kids love working in groups and don't want to miss it. 

4. When first starting groups during the school year, bring the class together after group work and discuss what worked and what didn't. What can be done to make groups run smoother next time? Discuss with students why there are strick rules about kindness when chosing a partner, and kindness in dealing with all partners in a group. If working in groups of three or more, how did they get all members of the group to participate?

5.  If you are ready to get your students working in groups, think about your seat arrangement. I always arrange seats in tables of five or six. Then when I want a larger group they are already seated in one. No choosing is necessary. I change groups around every couple of weeks, just so they don't always have to work with the same people. When working in a larger group like this, it is helpful to have a procedure in place when working through projects (like science). In that case the group chooses a recorder, a "getter" who collects materials needed, a "putter" who puts things away, and a student to report findings. Other group members are "the brains" who help complete the task. 

6. Kids like to report what they learned, discovered, or wrote in their groups. Giving each group a minute or two for the reporter to "report" is a nice way to share information and bring the lesson to a close. 

My job is to circulate like crazy while students work in groups. That way, I can defuse problems before they start, find students who are hogging the floor, or remediate misunderstandings. The more kids work in groups, the better they get at it. After a month or so my students can get into pairs, or groups of three in a minute or two. It takes practice, and I have to be really consistent in making sure rules are followed, but the results are worth it! 

Check out my store to access freebies and paid resources that make the Common Core fun!


Thursday, June 11, 2015

Organisms and Habitats


Organisms and habitats is one of my favorite units...for the kids as well!  To round out any unit we all need lots of "extras" to make it come alive for our students. I've searched the Internet for the best I could find for any organisms and habitats units. Included are games, videos and more.  I hope they help you out!!


This activity is perfect to learn about food chains!


This is a fun one for students third grade and younger! Find out about seaasonal changes in trees, what trees need to live and grow healthily and how trees both living and dead support life.


Kids will love this one!


This is a great video to open your unit.  It's only a little over five minutes. It's called, "Habitats: What is a habitat?"


This video covers different kinds of habitats, and animals that are found in each one. 


This is a fun game that covers the desert, coral reef, jungle and marsh habitats.  Perfect for a center or for fast finishers.


This PBS site is full of games that not only teach, but are Fun!


This video on organisms gets right to the point! Perfect for second or third grades.


This song will help kids remember what organisms need to survive!


Great anchor charts help kids understand concepts better, check these two out!


If you need some task cards, a game or even PowerPoint slides to round out your unit, check out my resources below.

Organism and Habitats Task Cards and More


Organisms and Habitats PowerPoint


Organisms and Habitats Digital Boom Cards


Be sure to follow me on Pinterest to get TONS of great ideas and freebies:


Sunday, May 31, 2015

Take A Closer Look At Guided Reading!


The last in a six part series on guided reading

In past guided reading lessons we have looked at finding guided reading materials, doing running records, keeping the rest of the class constructively busy, creating a schedule and getting ready for the guided reading session. So, actually conducting the guided reading lesson is the core of it all. How can we do it in the most constructive way possible, that is the best use of our time and that of our students? The ideas below might give you a few ideas! Keep in mind that I am no guided reading guru...just a teacher who has done guided reading for a long time!

1. Always start by asking a group to come to the reading table and take a book from the review basket to read for about five minutes or so. The review basket should be filled with books that have already been read by that particular reading group in earlier guided reading sessions. This is important in the guided reading process, as re-reading builds fluency. This is also a good time to do a running record or two on students who may need one. Each guided reading group will need their own basket of books.

2.  Introduce the new guided reading book, story or chapter book you are using. Introduce the vocabulary and give a short one-sentence idea of what the book, chapter or story is about. Take a picture walk and make predictions about the story. Build any background knowledge students may not have, and set a purpose for reading. Ask any "before you read" questions at this time. Assign a portion of the story, or chapter to be read silently.

3.  Ask students to whisper read the section. When they whisper read you know they are actually reading. Tell them it is not a race, and if they finish reading early they should re-read the selection again for fluency. For older students, you may not choose to have them whisper read. This is a preference based on the needs of the group. This is a good time to go from student to student and ask each to whisper read a little louder, so you can hear them read. This is a perfect time to see what strategies they are using, help them use new strategies you have taught, and get ideas on new lessons that may need to be taught directly to the group.

4.  Once everyone has read the selection, have a discussion about what has been read so far. This would be the time to use "While you read" questions. Finish reading the selection silently stopping now and again for questions and insights. Once the slection is finished, discuss "after you read" questions.

5. To include oral reading you can incorporate any of the following during guided reading:
a. Choral reading: Read a selection as a group. Choral reading is helpful for struggling readers as it gives support in numbers, helps with fluency and in vocabulary attainment. 
b. Echo reading: One person (teacher) reads a sentence or phrase with feeling while the rest of the group follows along, then echoes the reading orally. This is very useful for younger students.
c. Paired reading: read short section in groups of two.
d. There are other ways to incorporate oral reading. If you haven't had the chance to read "Good-bye Round Robin: 25 Effective Oral Reading Strategies" by Opitz and Rasinski, you can pick it for a few dollars on Amazon or Barnes and Noble. It is an amazing book (and short)...just sayin'

It is not imperitive that the entire selection is read orally, as long as students get the chance to read at least some of it orally.

6. Go over the words students had difficulty with. Using highlighter tape as students read to cover problem words as they read makes this easier.

7. Present a 5 minute lesson on a strategy appropriate to the group. Give students a worksheet or activity to work on at their desk. The worksheet is due at the next session. Remind students to keep the worksheet in their guided reading folder.

8. Make any notes on what you noticed in the guided reading session, as well as next steps for this group.

9. I often do not have time to finish an entire lesson in one reading group session. There is nothing wrong with taking two sessions to complete a lesson if your group needs the time. This is one thing that I have found that causes teachers the biggest headache...how to get everything in during one session. Be kind to yourself and make guided reading work for yourself and your kids...use two days if you need to.

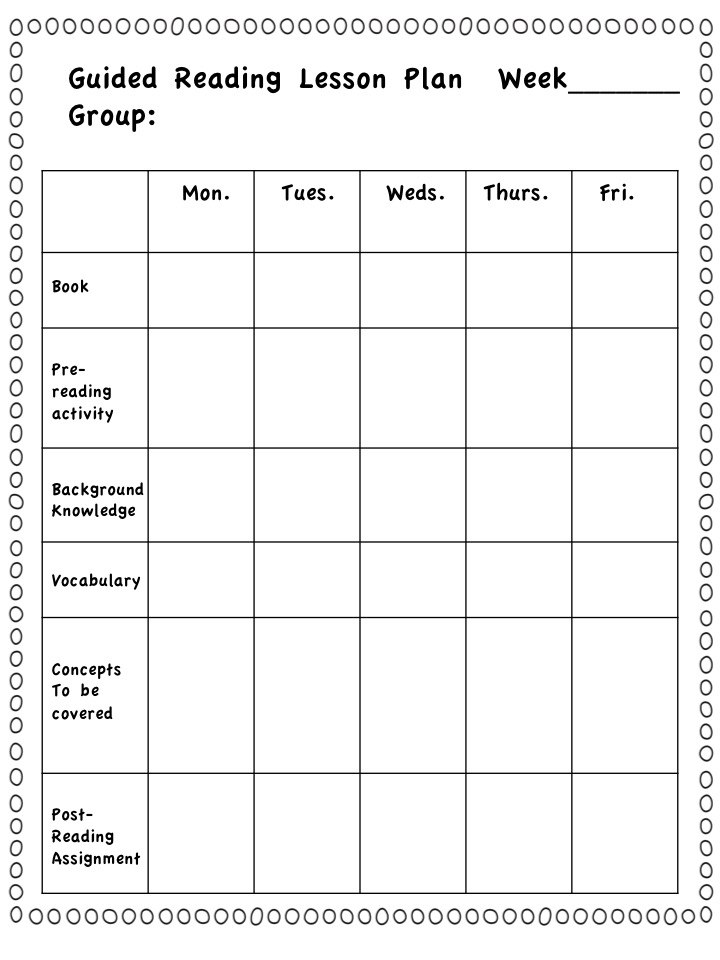
If you need lesson plan forms for guided reading, you might like one of the following ideas. They are downloadable in google.drive.  If they aren't exactly what you like, they may be able to give you an idea of two.


To read other lessons in this series see:
         
 If you are looking for a resource that guides you through the guided reading process, as well as giving you 100 differentiated worksheets to use during guided reading, check out the resource below by clicking on there picture:


Wednesday, May 20, 2015

Creating a Guided Reading Schedule that WORKS!


Guided Reading Lesson 4

Nothing can give a teacher a headach faster than trying to create a schedule for guided reading. How often? How long? How many kids in each group? Below are a few of my thoughts. I'm no guided reading guru....just a teacher with lots of guided reading experience under my belt. I hope some of the ideas are helpful.

If you are just learning how to do guided reading, start with homogeneous groups. This would be all of the students reading at the beginning of second, another group reading at the end of third and so on. Your running records will let you know the kind of instruction they need as you look at the kind of errors made.

As you get more familiar with the guided reading process, you will become more comfortable using your running records to pull students together to work on specific types of errors or comprehension problems. At that point, you may be changing the make-up of groups fairly often. There are times I worked with a specific group for only a few sessions. Once the problem is corrected, we regroup to work on other areas of need. For now, working with homogeneous groups with a careful eye to their needs, as noted on the running records, is a good way to start without losing your mind.  When I first started guided reading I did homogeneous groups for the whole year, and didn't branch out until the next year. Slow and steady is better than moving too fast and freaking yourself out! Do remember, guided reading groups do change students fairly often. As students improve, groups will change.  Guided reading groups are not like the reading groups of years ago. (once you are a helicopter you can never be a rocket) type of thing. Guided reading groups will usually change with each running record session. When you feel confident enough, you will be able to pull students of different reading levels together for individual work. For now don't stress. It's all one step at a time.

How big and how often? For early-fluent and fluent readers (high second through fifth grade readers) groups can be 4-6 students and meet at least three times per week for about 20-25 minutes each time. If you have students in the emergent reader range (first through middle second) smaller groups of 3-4 students each that meet five times a week for 20 minutes each time is optimum. Second grade teachers will have 4-6 students in these groups, since those readers are on grade level. If you have an outlier or two (REALLY low or REALLY high readers) you might work with another teacher. You take the two or three low readers from both classes, while she takes the 2-3 very high readers. It can help keep you sane.

The schedules below are just an idea of how you might arrange a guided reading schedule of 90 minutes for your room. Yours will, of course, be individualized, but this could get you started and give a few ideas.


If you would like to download the above schedules in PowerPoint Click Here

I hope these schedules give you some useful ideas to use as you make your own schedule. If you would like to see the other posts (some with freebies attached) in this guided reading series check out:


If you are looking for a resource that takes you through the guided reading process, plus gives you 100 guided reading worksheets that are differentiated, check out the resource below by clicking on the picture: