Sunday, May 31, 2015

Take A Closer Look At Guided Reading!


The last in a six part series on guided reading

In past guided reading lessons we have looked at finding guided reading materials, doing running records, keeping the rest of the class constructively busy, creating a schedule and getting ready for the guided reading session. So, actually conducting the guided reading lesson is the core of it all. How can we do it in the most constructive way possible, that is the best use of our time and that of our students? The ideas below might give you a few ideas! Keep in mind that I am no guided reading guru...just a teacher who has done guided reading for a long time!

1. Always start by asking a group to come to the reading table and take a book from the review basket to read for about five minutes or so. The review basket should be filled with books that have already been read by that particular reading group in earlier guided reading sessions. This is important in the guided reading process, as re-reading builds fluency. This is also a good time to do a running record or two on students who may need one. Each guided reading group will need their own basket of books.

2.  Introduce the new guided reading book, story or chapter book you are using. Introduce the vocabulary and give a short one-sentence idea of what the book, chapter or story is about. Take a picture walk and make predictions about the story. Build any background knowledge students may not have, and set a purpose for reading. Ask any "before you read" questions at this time. Assign a portion of the story, or chapter to be read silently.

3.  Ask students to whisper read the section. When they whisper read you know they are actually reading. Tell them it is not a race, and if they finish reading early they should re-read the selection again for fluency. For older students, you may not choose to have them whisper read. This is a preference based on the needs of the group. This is a good time to go from student to student and ask each to whisper read a little louder, so you can hear them read. This is a perfect time to see what strategies they are using, help them use new strategies you have taught, and get ideas on new lessons that may need to be taught directly to the group.

4.  Once everyone has read the selection, have a discussion about what has been read so far. This would be the time to use "While you read" questions. Finish reading the selection silently stopping now and again for questions and insights. Once the slection is finished, discuss "after you read" questions.

5. To include oral reading you can incorporate any of the following during guided reading:
a. Choral reading: Read a selection as a group. Choral reading is helpful for struggling readers as it gives support in numbers, helps with fluency and in vocabulary attainment. 
b. Echo reading: One person (teacher) reads a sentence or phrase with feeling while the rest of the group follows along, then echoes the reading orally. This is very useful for younger students.
c. Paired reading: read short section in groups of two.
d. There are other ways to incorporate oral reading. If you haven't had the chance to read "Good-bye Round Robin: 25 Effective Oral Reading Strategies" by Opitz and Rasinski, you can pick it for a few dollars on Amazon or Barnes and Noble. It is an amazing book (and short)...just sayin'

It is not imperitive that the entire selection is read orally, as long as students get the chance to read at least some of it orally.

6. Go over the words students had difficulty with. Using highlighter tape as students read to cover problem words as they read makes this easier.

7. Present a 5 minute lesson on a strategy appropriate to the group. Give students a worksheet or activity to work on at their desk. The worksheet is due at the next session. Remind students to keep the worksheet in their guided reading folder.

8. Make any notes on what you noticed in the guided reading session, as well as next steps for this group.

9. I often do not have time to finish an entire lesson in one reading group session. There is nothing wrong with taking two sessions to complete a lesson if your group needs the time. This is one thing that I have found that causes teachers the biggest headache...how to get everything in during one session. Be kind to yourself and make guided reading work for yourself and your kids...use two days if you need to.

If you need lesson plan forms for guided reading, you might like one of the following ideas. They are downloadable in google.drive.  If they aren't exactly what you like, they may be able to give you an idea of two.


To read other lessons in this series see:
         
 If you are looking for a resource that guides you through the guided reading process, as well as giving you 100 differentiated worksheets to use during guided reading, check out the resource below by clicking on there picture:


Wednesday, May 20, 2015

Creating a Guided Reading Schedule that WORKS!


Guided Reading Lesson 4

Nothing can give a teacher a headach faster than trying to create a schedule for guided reading. How often? How long? How many kids in each group? Below are a few of my thoughts. I'm no guided reading guru....just a teacher with lots of guided reading experience under my belt. I hope some of the ideas are helpful.

If you are just learning how to do guided reading, start with homogeneous groups. This would be all of the students reading at the beginning of second, another group reading at the end of third and so on. Your running records will let you know the kind of instruction they need as you look at the kind of errors made.

As you get more familiar with the guided reading process, you will become more comfortable using your running records to pull students together to work on specific types of errors or comprehension problems. At that point, you may be changing the make-up of groups fairly often. There are times I worked with a specific group for only a few sessions. Once the problem is corrected, we regroup to work on other areas of need. For now, working with homogeneous groups with a careful eye to their needs, as noted on the running records, is a good way to start without losing your mind.  When I first started guided reading I did homogeneous groups for the whole year, and didn't branch out until the next year. Slow and steady is better than moving too fast and freaking yourself out! Do remember, guided reading groups do change students fairly often. As students improve, groups will change.  Guided reading groups are not like the reading groups of years ago. (once you are a helicopter you can never be a rocket) type of thing. Guided reading groups will usually change with each running record session. When you feel confident enough, you will be able to pull students of different reading levels together for individual work. For now don't stress. It's all one step at a time.

How big and how often? For early-fluent and fluent readers (high second through fifth grade readers) groups can be 4-6 students and meet at least three times per week for about 20-25 minutes each time. If you have students in the emergent reader range (first through middle second) smaller groups of 3-4 students each that meet five times a week for 20 minutes each time is optimum. Second grade teachers will have 4-6 students in these groups, since those readers are on grade level. If you have an outlier or two (REALLY low or REALLY high readers) you might work with another teacher. You take the two or three low readers from both classes, while she takes the 2-3 very high readers. It can help keep you sane.

The schedules below are just an idea of how you might arrange a guided reading schedule of 90 minutes for your room. Yours will, of course, be individualized, but this could get you started and give a few ideas.


If you would like to download the above schedules in PowerPoint Click Here

I hope these schedules give you some useful ideas to use as you make your own schedule. If you would like to see the other posts (some with freebies attached) in this guided reading series check out:


If you are looking for a resource that takes you through the guided reading process, plus gives you 100 guided reading worksheets that are differentiated, check out the resource below by clicking on the picture:


Here Comes Guided Reading!


Time for lesson 5 in my guided reading series.

Ok! You have your running records done, you have students grouped. You've practiced with your students what to do while other students are at guided reading, and you have a schedule. Now you're ready to start. Well.....Maybe.  When I started doing guided reading, this is exactly the point that the butterflies started!  What could I do to make that first guided reading group, and every one thereafter go smoothly? Actually, following a few simple steps to prepare for every guided reading group, will make everything not only run more smoothly, but be much easier to teach!

Before you even begin that first session, you will need to read over the guided reading selection, write down questions from the selection and decide on 3-5 vocabulary words. Sometimes the vocabulary is given to you with a district series. I have included a few generic informational text question card for you to use as well. They can get you started. They are arranged by "before reading", during reading" and "after reading".

One way to organize all of your teaching information, and keep it for future use, is to use a notebook for each reading level. In the notebook include a page for each reading selection. Write the name of the selection, a one sentence over-view, vocabulary words, a list of "find out why, who, and what" questions to ask as you give students a reason to read. Also list questions to ask during reading and once they are finished. If you are using generic question cards from me or ones you made yourself, you might skip this last step. If your school district requires you to include standards covered in each story, write them on the page as well.  You might be sweating over the time this will take the first time you do it....but that is only the FIRST time. After that you can use the same stories year after year with no sweat at all. A little time spent, for lots of time saved later on!!

Getting ready:
You will need:
1. A notebook or note cards to jot down information on each reader
2. Lesson plan
3. Work sheet or activity for students
4. Basket of books that have already been read with each group. When first starting guided reading, use books a bit easier than what you are working on. Replace them as you complete stories or books. This basket is for books already read in guided reading. Students reread them during the first five minutes or so of guided reading. Rereading is KEY and not to be missed. You will have a basket for each guided reading group.
5. Highlighter tape. I use this for students to highlight words they can't figure out as they read along. The group can then go through (when everyone is finished) and work on any words the group members had difficulty sounding out. The tape is reusable, so I have students put their used tape on a dry erase board for later use.
6. Dry erase boards for each student. These useful teaching tools can be gotten for less than $13 for your whole class at stores like Home Depot. Ask for melamine, also called "Thrifty White Panel Board" at Home Depot. (this is not a Home Depot advertisement, it's just close to me so I'm familiar with it). It is 4 feet by 8 feet and is slick and white. It makes a great dry erase board. When I tell them I am a teacher, and it will be used for my students as white boards, they cut it into one foot by one foot sections for free. If they are hard-nosed for you, it is a $1 per cut.  This gives you 36 boards. I keep extra at the guided reading table so kids don't have to bring their own. At the beginning of the year I give each child his or her own board, asking them to write their name in sharpie on the back. They may NOT, NOT, NOT take them home until the last day of school. I use them with about everything, math, science, guided reading...the works! It gives kids the chance to write their own answers, do quick computations and so on. The edges don't have to be taped either. I never had a student have trouble with an edge.
7. A guided reading folder for each child. This is the folder they will keep guided reading worksheets and materials in, as well as small books and anything else you may need students to keep track of. It comes with them to guided reading each day.

These questions cards are generic for any informational text you might use. You can make them up yourself for any genre for quick question use. Make sure they meet the Common Core for your grade level. The cards below meet the Common Core for third grade. 

Download in Google.drive on the link below.


For other lessons in this series see:

Are you looking for a resource that takes you through the guided reading process, plus gives you 100 differentiated guided reading worksheets?  If so, check out the resource below by clicking on the picture.


Saturday, May 2, 2015

Don't Hide From Running Records


I know that the one thing that drove me totally nuts, when I first started guided reading, was running records. The kids read faster than I could write! I couldn't remember the symbols! And when, oh when to fit it in??? 

The following is not the know-all, do-all running records information. It's the information that worked for me. There are classes and even books (Yes, whole BOOKS...OMG!) written on running records. I just can't deal with that. It has to be easy, it has to be fast. Assessment is important, but so is teaching. For me, running records has to be quick and reliable, so that I can get to the important job of teaching. The information below has helped me do that. 

What are Running Records?  
They are just a short way to assess at what level your student is reading. It's a guide to help you know what the student knows, and what she needs to learn next.

Where to start:
If you are using guided reading in your district, you probably have materials for running records. If you don't, it's not that hard to make your own. Choose one story in each reading level that you need to test. Don't use that story for anything else but running record selections. That's because at some point you will have a student who needs more than two attemps at passing a reading level. If you have a book already selected for that reading level, it's easy enough to select another reading section to use if needed. 

Choose a 100-150 word selection from the story to use as the running record. Type out the selection you want to use. (level it by grade and month with either Okapi Readability or any other readability index).  This will let you know if your selection is a beginning, middle or end of that particular readability level. When I used a readability index I used: (for example for the third grade reading level) 3.0-3.3 for beginning of the reading level, 3.4-3.6 for middle and 3.7-4.0 for end of the reading level. I always needed to go to at least sixth grade for my third graders, and often had to have some for first as well.Then copy it in single space with larger text for the kids to read, and do one in double space for you to use. That will give you space to make notes. I have also used the freebie at the end of the post to do running records. I like it because everything is on the page that I need. Whatever works for you is fine. To save time in future years, I copied two different selections from the chosen story. That would give me a second one to use in case the student failed the first time, and needed to retest on that reading level. Keep the book in the folder as well, in case a student needs a third, or even fourth attempt at that level. I copied three or four of each student copy, and a bunch of each for me. I then put all copies in a file folder under the reading level it tested. It takes time the first year, but is super simple from there on. By the time I was done I had a folder for first grade level beginning, one for middle and one for end, second grade beginning, middle, end and so on with each reading level I might need.

 It is advised that you do running records every four to six weeks, but I think you can't fatten a pig by weighing it. My goal was to get in at least four whole-class running records by the end of the year. There are those who would faint at this, but it kept me sane. That's a big deal (for me). If a student needs a running record for any reason, it can always be done on a "need" basis.  

Organize
Organizing does not come easy to me...not even a little. However, it is really important to keep running records organized in a file folder box, or in a file cabinet. 

Each student will also need his or her own running record file to keep track of what was passed and failed, and to see how many attempts were needed to pass each level, as well as dates attempted. This is great material for conferences. If you have a student that needs psychological testing, this is perfect documentation.

At the middle and end of each year, I would show students their folders and talk about how much they have grown in reading. Low readers don't realize how much they have grown, and literally have to see it on paper. Part of their problem is that they don't see the progress, even when it is there. It must be shown to them for them to believe it. If you do student led conferences, this documentation is vital (I highly recommend these conferences). I did a guest blog post for Rachel Lennett on it at: Make A Real Impact On Student Learning) It includes a great freebie to start you with the process as well. 


Doing the Running Record
You can do running records in two ways. Either fit one or two running records in during guided reading time, or replace guided reading with running records for a day or two. 
If you replace guided reading with running records, the rest of the kids do a center that is just for their guided reading group. Add two or three books, worksheets and give writing assignments for each group at their guided reading center. All directions, and what to do first, second and so on are posted at the center. When they complete all assignments, they can have free reading time...which they love! This is a great time for re-reading past guided reading books. Use the proceedure that keeps you sane. Some teachers go crazy if they have to do running records and guided reading at the same time. Take a breath! 

Steps:
1. Assemple all supplies you need. If this is the first test of the year, I look at last years testing results to determine where to start. Many programs give vocabulary lists to test, but this has not worked for me. I end up starting too high or way too low. Last year's work has proven to be the best predictor of what grade level I should start testing with to determine reading level. I want to give as few running record assessments as I can to find the instructional level. I keep the box with all blank running records materials beside me.

2. Have a pen, calculator, your running record photocopy of the 100-150 word selection and the book or sheet the student will be reading.

3. Talk about the title of the story and discuss briefly what it is about (i.e.. This text is about a boy with a big problem.)

4. Show the student where you would like him to start and stop reading. Ask the student to read the selection to himself and let you know when he is finished. Do not give any assistance with words.

5. Write the student's name on your running record copy.

6. When the student has finsihed reading silently, ask him to retell the part of the story that was read. The retelling should be well organized and have detail. It should hit the main points and capture the meaning. Those who didn't quite get the meaning will list unconnected events and lack focus. Ask a couple of probling questions. Note your observations on the record sheet at the bottom or back of the page. A good retelling as 100%, slight confusion is 80% and anything less is not comprehending the text. Less than 80% comprehension would put the student at frustration level, and an easier level should be given. This is true even if the child can "word call" the words easily. Word calling is not understanding. I have had students who could word call at two levels above third grade, but not understand any of it. This isn't reading. 

7. Ask the student to read the selection out loud. As he reads fill out your running record using the shorthand as listed below. By the way, this is when you really understand why it is called a "running" record. You have to run to keep up !  These are the main codes I used:

Correct Words: It is recommended that a checkmark be put above every word read correctly. I tried this for a long time, and it about drove me nuts. I started leaving the correctly read words alone and only noted the problems encountered, and I have to say it simplified my life! 

Substitution: If a child substitutes one word for another, write the substituted word above the text word and underline it.

Omission: Draw a line above the word omitted

Insertion: If a student adds a word that isn't there, make a carrot and write the substituted word above the carrot.

Told by Teacher: If the student can not continue unless you give the word, write a "T" above that word. Only do this if the child can not continue and just stops. 

Repitition: The child rereads a phase more than once: Write an R after the repeated word or phase and draw an arrow back to the beginning of the repetition.

Self-Corrections: When a student self-corrected himself write  "SC" above the word. This is NOT counted as an error.

There are more codes, but these are simple, and help get you started without being overwhelming. 
At the bottom of your form write any additional habits the student has while reading, such as using his finger as he reads, pulling at his hair etc. A running record is meant to give not only the error count, but a window into how a student is reading.

Count as one error:
substitutions
omissions
insertion
told by the teacher
repitition 

Do not count:
self-corrections (note these, but they are not counted) 
words promounced differently because of a child's accent

Never correct a student for errors during running records. This is a time to record only. 

Determining the instructional Reading level:
Determining the instructional reading level is finding a combination of both correct reading of the words, and understanding of what is read. They go together.

The goal of running records is to find a student's instructional reading level. There are lots of opinions out there about what constitutes this. However, most opinions differ by only a point or two. Once you have determed the percentage of errors to words, this is the guide I go by to find the instructional level:

97%-100% correct, questions about the text are answered correctly, understanding is complete. This is the level that is perfect for independent reading.

92%-96% correct, 80% comprehension. This is the perfect level to grow vocabulary, strategies and comprehension. THIS is the guided reading level you are looking for.

91% or lower correct, or comprehension less that 80%. This is the frustration level. Research has shown that little is gained and much can be lost if a student is being instructed at his or her frustration level. 

To find the percentage of word accuracy, take the numeober of words that were correctly read, and divide by the number of total words in the selection. This percentage, and the comprehension level, tells you if you have found the instructions level or not. Remember that perfect word-calling without comprehension is not reading. 

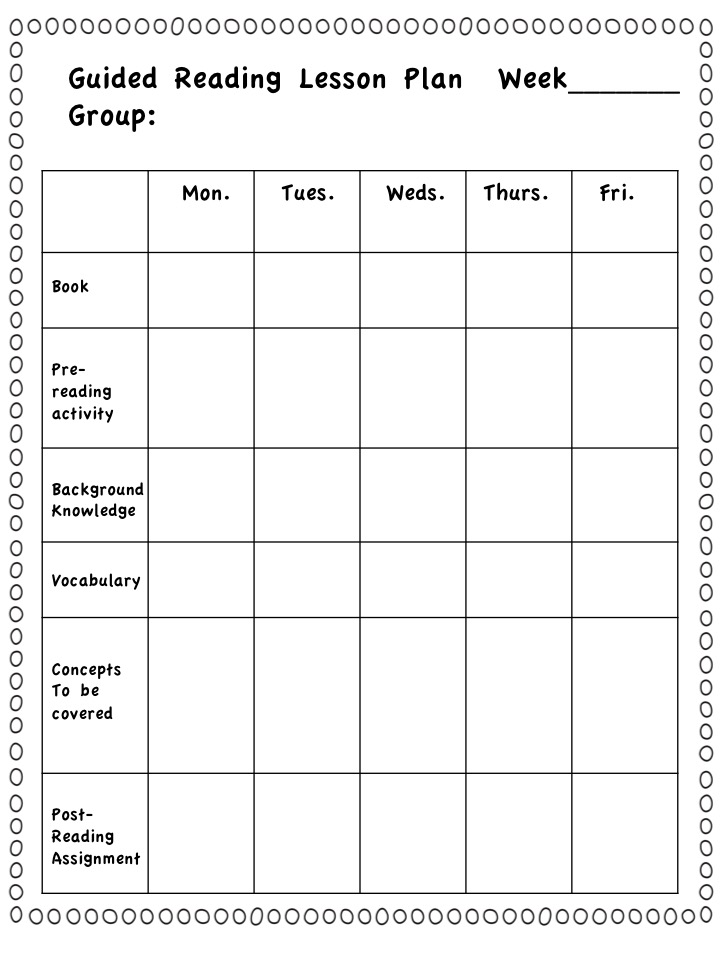
Below is the guided reading form I liked the best. If it will help you, you can download it in Google.drive. I type up the text on the computer, turn the form upside down in the copy tray and copy the text onto the form. The student sheet will have only the text, with a larger font. The student sheet can be used again and again with different students. Your sheet is specific to each student.


Well! This has been a long one! There are many, many sites out there that can give you much more information on running records! Once you have done it once or twice, you'll be ready to add even more into your routine (without losing your mind!)

This is the second in my series about guided reading. You may want to check out the other titles below.


Are you looking for a resource that not only gives you guided reading advice, as well as 100 worksheets to use with your guided reading groups...perfect for differentiation among groups! Check out the resource below by clicking on the picture.